
Connect Your Marketing Accounts to ChatGPT
Same connector, different model: create a workspace, grant Google access, add the connector in ChatGPT. Three steps until ChatGPT reads and updates your marketing accounts.
Minutes from now, you query your marketing data directly in ChatGPT. No exports, no dashboards, plain language.
The connector is model-agnostic: the same access that works in Claude works in ChatGPT. You connect your accounts once. After that, ChatGPT answers any question about campaigns, rankings and visitors, straight from your real data. And when you want, it also changes things, guarded by your workspace permissions and the plugin’s permissions setting. This guide gets you to your first query in three steps.
What you need: a Google account with access to your marketing accounts, and a ChatGPT account; the free plan is enough. The trial costs nothing, no credit card required.
Working with Claude? Connect Your Marketing Accounts to Claude shows the setup there.
Step 1: Create a workspace and connect Google
Already done this, say for Claude? Skip to step 2: your workspace works for both.
Sign in to the portal at app.ads.honeyfield.at. Then three moves:
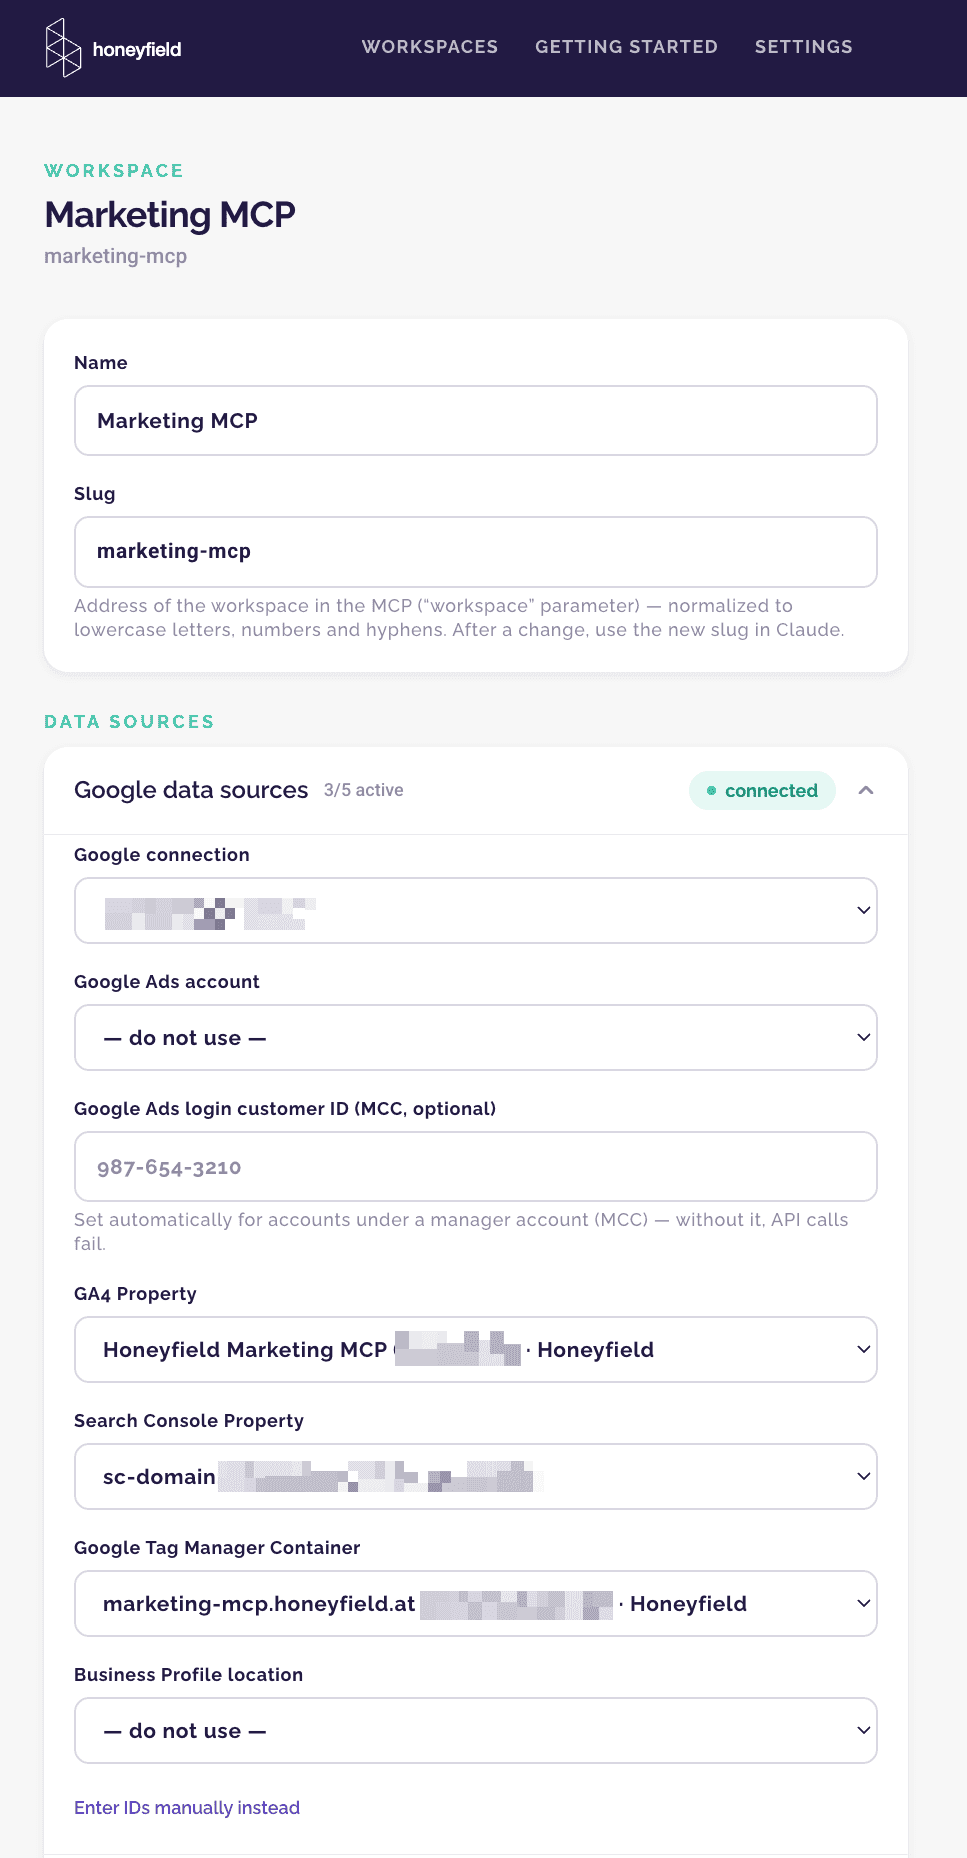
- Click “Connect with Google”. One approval covers five sources: Google Ads, GA4, Search Console, GTM and your Business Profile. You confirm the Google login once.
- Create a workspace. A workspace stands for one client or one account. Data stays cleanly separated, even when more clients join later.
- Assign the workspace its data sources. You pick the account, property and site from dropdowns. ChatGPT later sees exactly what you assign here, nothing else.
✓ Checkpoint: your workspace shows the assigned sources.
Meta Ads, LinkedIn Ads, WordPress, Strapi, Clarity and DataForSEO join the workspace the same way later. Google is enough to get started. The portal’s “Getting started” page shows where to grant access and where the IDs live, with a short guide per source.
Step 2: Add the connector as a plugin in ChatGPT
Now tell ChatGPT where your data lives. Custom MCP servers are called “plugins” in ChatGPT, and they need a switch that is off by default: developer mode.
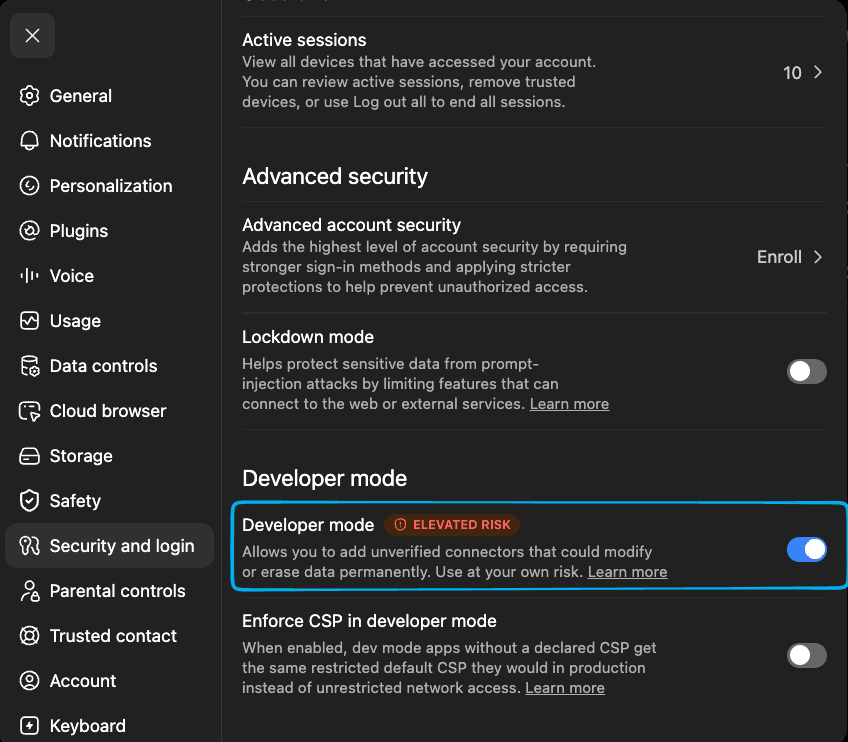
1. Open the settings, go to “Security and login” and enable “Developer mode” at the bottom. ChatGPT warns about “elevated risk”: the switch allows connectors OpenAI has not reviewed. That is exactly what it is for.
2. In the settings, go to “Plugins” and click the plus at the top right.
3. In the “New Plugin” dialog, enter “Marketing-MCP” as the name and paste this address under “Server URL”:
https://mcp.ads.honeyfield.at/mcpThe address sits in its own box because it can change. Copy it from here. Authentication stays on “OAuth”; leave the advanced OAuth settings closed.
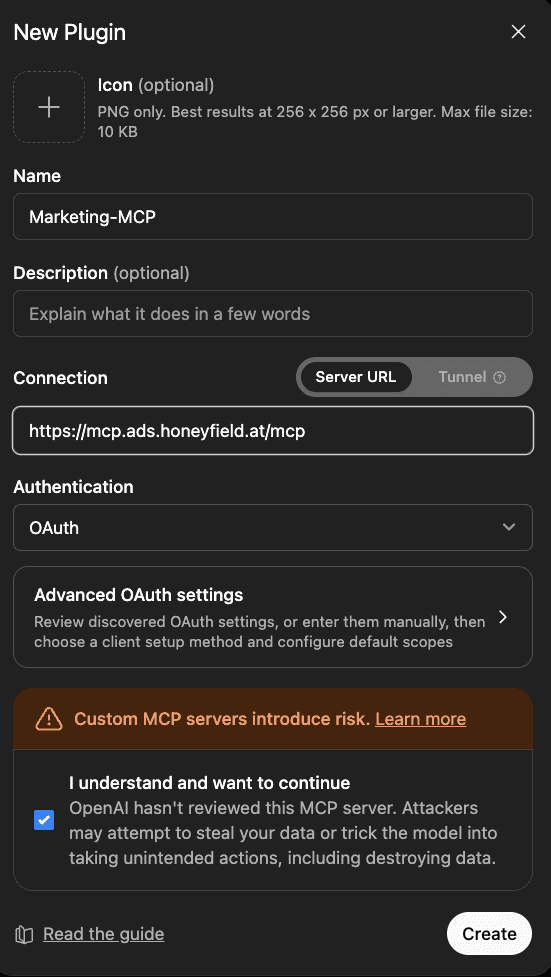
4. Tick “I understand and want to continue” at the bottom and click “Create”. ChatGPT shows that warning for every custom MCP server.
5. ChatGPT opens “Add MARKETING-MCP-Tool to ChatGPT”. Click “Sign in with MARKETING-MCP-Tool”. That name comes from our server itself; it does not have to match your plugin name.
6. You land on the platform sign-in. Log in with your portal account, via email and password or “Sign in with Google”. On the “Allow access” page, confirm with “Allow”.
Don’t mix up the accounts: what counts here is your portal account, not the Google email from step 1. You can register the portal account with any email; the Google connection is just the data grant behind it.
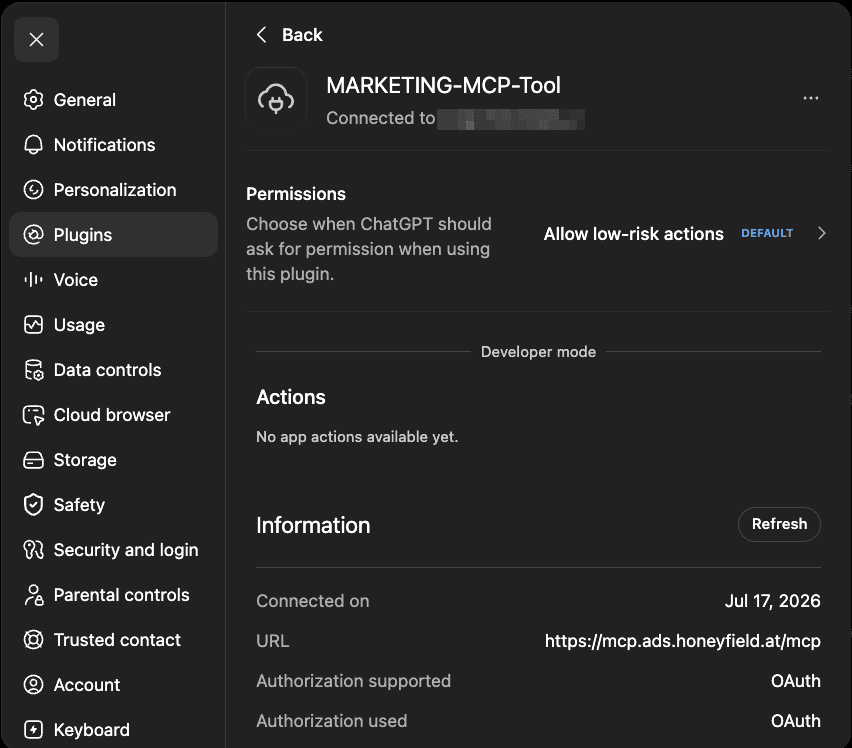
✓ Checkpoint: the plugin details show “Connected to” with your account, including the connection date.
Step 3: Pick your workspace and ask the first question
ChatGPT has no dropdown. You tell it in the chat which workspace you mean, like everything else. Get the list first:
Which workspaces do I have?You get your workspaces with their handles, like client-a. The handle sets the workspace for this chat. The answer to it doubles as your first real query:
Use the workspace `client-a` in this chat.
Which data sources are connected there?This is what the answer looks like on our own workspace: Google Ads, GA4, Search Console, GTM, Business Profile, Clarity, DataForSEO, Meta Ads, LinkedIn Ads, Strapi and WordPress. Eleven sources, we connected everything. Yours shows the sources from step 1.
If you only have one workspace, ChatGPT picks it automatically. Then the second question is simply your source check.
✓ Checkpoint: if you see your source list, the connection stands.
From here, every further question is just a prompt. The best fourteen for everyday work are in Your First Prompts; they work in ChatGPT just the same, there it simply says “your agent”.
Reading and writing: from here, both work
The connection does more than fetch numbers. ChatGPT reads your data, and it also changes it, if your workspace permissions allow writing. Reading happens right away. For writing, the plugin’s permissions setting decides when ChatGPT checks with you first: the default “Allow low-risk actions” only waves low-risk operations through, everything else you confirm one by one. And new campaigns are created paused until you activate them.
What’s next
Take Your First Prompts next and try them on your freshly connected workspace. If your team also uses Claude, Connect Your Marketing Accounts to Claude shows the same setup there.