
Google Ads MCP Server: Connect Google Ads to Claude
Authorise Google, assign the Ads account, add the connector: in four steps Claude reads your Google Ads account. With three prompts to get started.
The Google Ads MCP connects your Google Ads account to Claude. From then on you ask about campaigns, search terms and budgets in plain language. No exports, no Google Ads interface.
MCP stands for Model Context Protocol: an open standard that lets Claude access external data and tools. The Honeyfield Marketing MCP is one such toolbox. Google Ads is one of its eleven sources, and this tutorial covers that one source.
Once set up, Claude reads everything you can see in your Google Ads account: campaigns, ad groups, keywords, search terms, impression share, budgets, change history. With write access Claude also makes changes: adds negatives, pauses keywords, adjusts budgets, creates campaigns. Every change only after you approve it in the chat.
What you need: a Google account with access to the Google Ads account, either directly or through your manager account (MCC). Plus a Claude account. The trial is free, no credit card required.
Working with ChatGPT? The connector is model-agnostic. Steps 1 and 2 are identical; for step 3 see Connect Your Marketing Accounts to ChatGPT.
Step 1: Connect your Google account in the portal
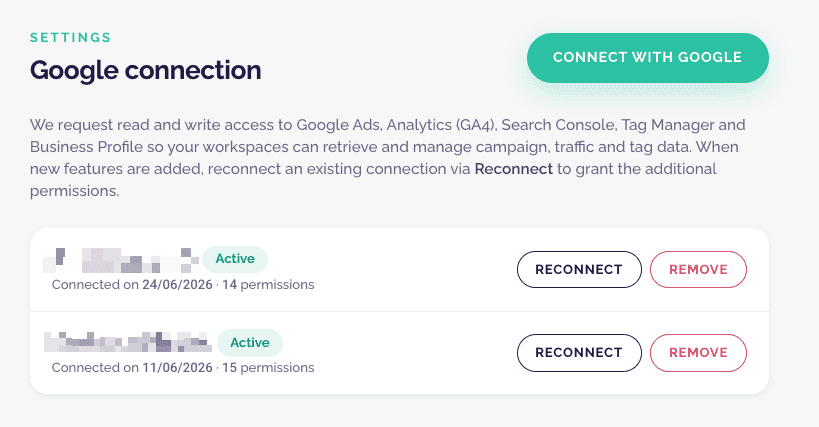
Sign in to the portal at app.ads.honeyfield.at. Open the settings, go to "Google connection" and click "Connect with Google".
Google asks you to grant permissions. One authorisation covers five sources: Google Ads, GA4, Search Console, GTM and your Business Profile. You confirm once and Google sends you back to the portal.
✓ Checkpoint: The portal confirms the connection. Your Google account appears in the list with the status "Active".
Not working? If the portal says Google did not issue a refresh token, you have granted access before. Remove the app at myaccount.google.com/permissions and click "Connect with Google" again.
Step 2: Create a workspace and assign the Ads account
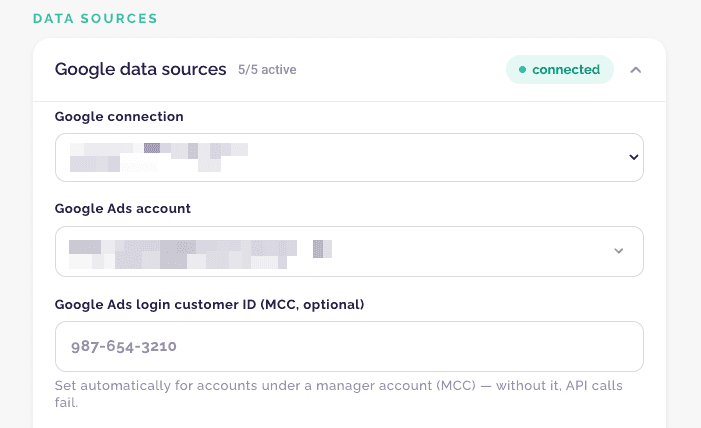
A workspace represents one client or one account. Create one and open it. In the "Data sources" section, expand "Google data sources".
- Under "Google connection", pick the account from step 1. The portal now loads every Google Ads account this Google account can see.
- Under "Google Ads account", pick the right one. Each entry shows the name and the customer ID in the format 123-456-7890.
- Save.
Accounts under a manager account (MCC): These appear in the dropdown with the suffix "via MCC". When you select one, the portal fills in "Google Ads login customer ID (MCC, optional)" automatically. Leave it as is. Without this ID the API calls fail.
Account not in the dropdown? Click "Enter IDs manually instead" and type the customer ID into "Google Ads customer ID". You find it in ads.google.com in the top right corner. If the account sits under an MCC, enter the MCC's ID as the login customer ID.
✓ Checkpoint: The Google section shows "connected" and the counter reads at least "1/5 active".
You assign the other four Google sources on the same page if you like. For this tutorial, Google Ads is enough.
Step 3: Add the connector in Claude
If you have already added the Marketing MCP to Claude, skip this step. The connector knows every workspace of your team, including the new one.
Otherwise: stay in the browser where you are signed in to the portal. In Claude.ai open the settings, go to "Connectors" under "Customize", click "Add" and then "Add custom connector". Name: "Marketing-MCP". URL:
https://mcp.ads.honeyfield.at/mcpClick "Add", then click the connector and "Connect". You confirm with your portal account. The full walkthrough with screenshots is in Connect Your Marketing Accounts to Claude.
Claude Code: There you install the access together with ready-made Ads skills as a plugin:
/plugin marketplace add Honeyfield-Org/honeyfield-marketplace
/plugin install honeyfield-marketing-mcp@honeyfield-marketplace✓ Checkpoint: The connector shows "connected".
Step 4: Your first three Google Ads prompts
Open a new chat and enable the connector. If you have several workspaces, name the right one first:
Use the workspace `client-a` in this chat.
Which Google Ads campaigns are there, with status and daily budget?This is what the answer looks like on our own account: five campaigns, four of them paused, one active search campaign with a 40 euro daily budget. Claude lists the type and bidding strategy for each campaign.
✓ Checkpoint: If you see your campaign list, the connection works. From here on, everything is just a prompt.
Second prompt, the performance:
How did the campaigns perform over the last 30 days?
Impressions, clicks, cost, CTR, CPC and conversions per campaign.Ours: 1,858 impressions, 151 clicks, 1,126 euros in cost, 8.1 percent CTR, 7.46 euros CPC, zero conversions. That last number is why the third prompt is the most important one.
Third prompt, the money:
Show me the search terms from the last 30 days with clicks but no conversion.
Which ones do not match our offer?Claude pulls the search terms report and sorts it. Ours contained searches for third-party app builders and competitor names: three clicks for 29 euros on one builder's name, no lead. Exactly these terms are candidates for negatives. How to add them with Claude is the next tutorial.
What the Google Ads MCP can do
Read, right away: campaigns, ad groups, ads, keywords and their quality, search terms (including Performance Max and AI Max), impression share, budget status, performance by device, region, audience and time of day, conversions, recommendations, experiments, change history.
Write, after approval: negatives at account, campaign and list level, adding, moving and pausing keywords, changing bids and budgets, creating and replacing ads, creating campaigns, setting target regions and languages, ad schedules, sitelinks, conversion actions, uploading customer lists.
Writing only works if your workspace permissions allow it. Claude shows every proposal, you confirm, and only then does it run. New campaigns and ads are created paused.
What's next
Continue with Find Wasted Ad Spend and Set Negatives. That tutorial starts exactly where prompt three ends: with the search terms that cost money and bring nothing.